Thursday, 29 December 2011

My Dear Diaries

December 29th, 2011.
Dear Diary,

Well, Christmas is over and I am hanging in those limbo days before the year is over. It’s been a good year, but I can’t wait for a fresh start in 2012! I've got some snazzy new stuff, a new outlook on life and, of course, a new journal to keep track of it all.


In My Not-So Perfect Life, you tell it like you think it should be, and then how it really is, to see all the reasons why imperfection rocks! 


Or record your life in scribbles with Doodle Journal, packed with prompts and pages that turn your random scribbles into works of art. 


It’s all about Me! is full of fun quizzes, games and picture puzzles to uncover what makes you tick.


So, if you’ve ever wondered about your rock band personality (I’m a bass playin’ babe), how psychic you are (me = not), or want to remember that favourite English teacher (shout-outs to Mrs. Waybrant!) and the silliest fight between you and your best friend (she totally bought the same sweater as me!), look no further than the cool, colourful pages of these super-fun journals for a fresh start in 2012.

See you next year!

Thursday, 22 December 2011

One Tree, Three Ways

One of my favourite Christmas rituals is the decorating of the tree. The smell of fresh evergreen in the air, a mug of hot chocolate for fuel, Christmas carols on the radio, the fireplace channel on TV, and I'm ready to go! 

When my dad would haul up the big cardboard box of ornaments from the basement, it was like the first Christmas present of the season. We’d open that box up and sort through all of our holiday trinkets and mementos, reminiscing as we draped the tree in paperclip ice skates, shrinky dink Santas, and pumpkin seed poinsettias.  Now that I have a tree of my own (albeit a very mini one), it’s time to start my own collection. I’m commemorating my first Christmas as an honest-to-blogger here with some handmade 100% Klutz ornaments.

Last week, while busily making my Christmas Velvet Art cards, I also put together some fuzzy Velvet Art ornaments (above). They’re super cute and easy to make; the perfect activity to keep little ones busy during snowy winter days. Just punch them out, colour (it doesn’t have to be inside the lines), add some string and you’re set! 

Looking for more of a creative challenge? Get twisted! Ever since I first made my Twisted Halloween Critters, I have been hoping for a chance to make some more. So I set to work with those colourful pipe cleaners and I love, love, love the results. Candy canes, wreaths, reindeer, earmuffs and mittens; these twisted ornaments (below) fill me with holiday joy! 

Finally, try your hand at some Fabulous Paper Dolls to finish it all off. Peel and stick clothes to make all sorts of paper people, then attach loops of string to hang. I made some wintery characters in honour of the season, and some extra special ornaments to celebrate this year’s milestones. A new baby girl in the family, a great tropical vacation, rereading all of the Harry Potter books; just some small reminders of all the things that made this year great. 
 Looking for some more last minute craft inspiration? Pick up Christmas Window Art and deck your windows out in some festive stained glass. You can also use Window Art to make this faux snow globe (below). Flip over a jar or wide vase and stick on some Window Art snowflakes. Then create a little scene to go inside your globe, like this one, made with Twirled Paper and some tea lights. 

Alright boys and girls, that’s it for me this holiday season. Time to hang up my scissors, put down the glue and let the celebrating begin.

 May your days be merry and bright, and may all your Christmases be… crafty!

Friday, 16 December 2011

Hot Holiday Accessories

Winter is a time for taking cover from the cold in big, fluffy hats and warm woolen mittens. But that doesn’t mean the season should be without style! Share some love with your under-appreciated appendages (head, arms and legs!) with some hot holiday accessories.


Headbands have had a style renaissance since their days in the 80s when they were thick, padded and paired with a scrunchy. Today, they are all about flair, with big bows, flowers and jewels to spare. I made these super stylish Headbands and Hairstyles for myself a while back, but this time around I’m all about sharing. It is almost Christmas, after all!

Pink ruffles and sequins for my favourite party girl. A black and blue bow band for a friend with more classic style. And who wouldn't love to get this simple red bow with just a hint of shine? 

If you've got more friends than headbands, make some super cute hair clips by attaching your bows and baubles to bobby pins. 

If headpieces aren't really your thing, try Brilliant Bead Rings! This colourful kit comes with a rainbow of seed beads and twisty wire so that you can string together rings for all of your friends, and maybe even that someone special! With seven designs to choose from there is one for all tastes and styles: make a simple coloured band, a costume-y flower ring or something completely different! In this season of holiday parties and gatherings, your friends will have plenty of opportunities to show off their new finger accessories. 

Even if you haven't got a crafty bone in your body, you can still give the gift of Klutz. Pick out a kit that you and your friends will love and give them an afternoon of awesome arts and crafts. They might even reward your thoughtfulness by sharing one of their creations.

For a full list of all of Klutz's fabulous kits, head here. But come back soon because next week it's all about trimming your tree, plus a couple of fun decorating projects.

Only one week of Christmas craftiness left… Better get busy!

Friday, 9 December 2011

Rockin' Stocking Stuffers

There are few things that make me swoon like a pretty piece of jewellery. Nothing too fancy; diamonds are not this gal’s best friend! My jewellery just needs to be fun, colourful and cute. When I first spotted Ribbon Bangles, I was smitten! And when it came time to decide what to get my best gals for Christmas, it was practically a no-brainer.

I used Ribbon Bangles a while back to give my Wicked Cool Friendship Bracelets a boost, but these beauties also deserve a chance to shine on their own. They are so simple to make! Just wrap the ribbon around the coloured plastic bangles, securing it in place with glue, and they're ready to wear! Slip one into a stocking for a rockin’ stocking stuffer or tie a bunch together with a Christmas ribbon for a more substantial present.

If bangles aren't really your bestie's style, these Charm Chains are sure to please. Make bracelets, pendants, earrings and more with the twist of a crochet hook. I even fashioned this one-of-a-kind hair clip (below) by twisting my beaded flower around a bobby pin. It was just so pretty that I had to remind myself that Christmas is a time of giving (so I wasn’t allowed to keep it for myself!).

It's so easy during the holiday season to get wrapped up in spending. But the heart of gift-giving is thoughtful, personalized presents that show you did more than just fork over some cash. So scan your list, pick your Klutz and get crafting. Then check back next week for more fabulous handmade gifts!

Friday, 2 December 2011

Handmade for the Holidays: Warm and Fuzzy Holiday Wishes

We've officially had our first snow of the season and as I watched those fluffy flakes swirl about, I was transported back to Christmases spent reading a book and eating sugar cookies under a blanket by the window as the snow blustered by outside. And though this snowfall only lasted a couple of hours, it's been in my mind all day. It's official, I'm in the Christmas spirit!

So, I'm spreading my cheer with cute Christmas Velvet Art cards. This fun little book is bursting with seasonal spirit, with tons of pop-out cards, gift tags, ornaments and art in fun patterns for you to colour. And the best part? They are all topped off with a touch of velvet!

Bright colours, festive designs and a fancy, velvet finish; what could be better? I made my cards with plain white paper and some red ribbon. Warm, fuzzy holiday wishes sure to melt the hearts of my most near and dear. Isn't that what Christmas is all about?

Check back throughout the month because the Christmas craftiness continues with Velvet Art ornaments, a DIY snow globe, my Window Art masterpiece, and some more great gifts to give your family and friends.

Let the holidays begin!

Tuesday, 22 November 2011

Handmade for the Holidays

There's music in the air and sales in the stores, lights are going up and that magical cheer is spreading. Yep, that's right, it's Christmas time. And since my birthday has finally come and gone, it's time to start the celebration!

Now, I am a Christmas lover to my core. Fun, food, family; it's pretty much the only thing that makes winter bearable. But it can also be pretty pricey, which is not ideal for this cash-strapped crafter. Luckily, you won't have to break your (piggy) bank to get into the holiday spirit this year! I'm celebrating the season with a month of homemade Christmas craftiness: decorations, cards, gifts... I'm doing it all, with a little help from Klutz.

Gifts tend to be the biggest budget buster, but not with this handy little book. Create personalized art pieces for all of your friends with Paper Stained Glass. These semi-transparent pages are begging to be infused with colour, whether you colour by numbers or go crazy with your own combinations.

Creating these pretty window pieces can be as easy or as detailed as you like. You can start off simple by taping your art to a window, or take it one step further by making a card stock frame (to keep your design sturdy) and attaching a ribbon for hanging.

For a more polished look, put your pieces in a picture frame that can be leaned against a windowsill or hung from a hook. That pretty heron will look great in my mom’s kitchen window! And my friend Rachel is sure to get a kick out of my quirky clothesline picture.

An old lamp gets a new lease on life with a quick wrap of this paper stained glass. I bet this indigo-hued creation will look great in my purple-loving sister's new apartment!


If you're feeling extra fancy, make this pretty paper lantern by folding a piece of cardstock to create a three-sided frame. Tape in your stained glass and finish it off with a battery-operated tea light to make it glow. It's the perfect gift for any little (or big) people who like a little light in the night.

Four great gifts from one simple book! How cool is that? Take a peek through a copy and see which designs inspire you to create some customized art for the ones you love.

And if you’re looking for more ways to decorate your windows, be sure to check back next week. I'm decking my halls with Christmas Window Art. Here’s a sneak peak

Tuesday, 15 November 2011

Story Book Horses

I think we’ve known each other long enough that I can share with you a truth that I sometimes keep hidden. It is a very polarizing opinion of mine, and one that has changed more than one person’s perception of me…

I am not an animal person.

I get why people swoon over cute and cuddly creatures, share an affinity for slithery reptiles, and fawn over our fine feathered friends. I’m just not one of them!

Luckily, this feeling doesn’t necessarily apply to animals of the paper persuasion. Couple that with my overpowering love of fashion, and I was actually kind of excited to delve into The Marvelous Book of Magical Horses. And if that wasn’t enough to carry me through, not long after cracking open that first page, I found inspiration in another love of mine.

I mean, come on, could this dark and fiery beauty be any other than The Hunger Games heroine Katniss Everdeen in horse form? All dark and moody, with a flaming mane and Mockingjay pin... Okay, I added that last one in myself, but that's the fun of these magical horses. There are tons of beautiful outfits to choose from, but you can also add your own embellishment and flair. And with peel and stick tabs, once you’ve had your fun, you can take it all off and start over and over again.

After dressing up Katniss Horse to do Cinna proud, I began to search for other literary characters on each punch-out page. Can you guess which story book horses I've created? Share your answers and your own awesome equine creations in the comments.


Friday, 4 November 2011

It’s My Party and I’ll Klutz If I Want To!

It’s finally November, my favourite month of the year!
Why, you ask? 

Because it’s my birthday month!


Yes, one cold mid-November morning I burst forth into the world, butt first and a month earlier than expected, and began a journey that has taken me all sorts of places. It hasn’t always been easy, but just look at me now! All grown up and blogging like a big girl (but still crafting like a little one, to be sure!). Not too shabby, if I do say so myself.

To celebrate the awesome year gone by, and another one just ahead, it’s time to get busy planning my party!

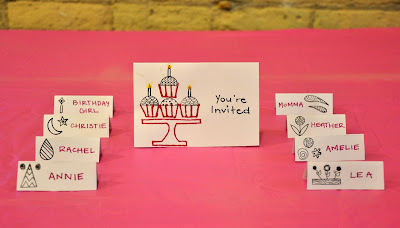
First stop, stationery! I had a pack of standard blank cards on hand, so I decided to have some fun with Stamp Art. Can we talk Stamp Art for a second? Because it is, like, the coolest thing ever! Basically, it’s a clear acrylic block and a ton of cool gel decals that you can peel and stick to your heart’s content. Mix and match and layer them, then start all over again. It’s amazing! I transformed those blank cards into too-cute cupcake invites, then used the envelopes to make these pretty little place cards (both below).


As for décor, I’m shouting out to my younger self with some good old-fashioned Cootie Catchers. Remember them? These folded fortune tellers were the height of elementary school fun! A bowl full of colourful cootie catchers (below) ought to spark some fun table conversation. The little ones are perfect for candle cupcake toppers (as seen below). And the blank cootie catchers do double duty as loot bags and thank you cards, with kind words and fun fortunes written inside.

Alright, I am officially excited! Only 15 days left and I’ve still got a lot of planning to do. Have you got a great Klutz birthday idea? Share it in the comments. To make this birthday bash top notch, I’m gonna need all the help I can get!

Monday, 31 October 2011

Wicked Cool Arm Candy

In case you couldn’t tell from this sunny coloured blog, I’ve always been one for bright and cheery things. Ruffles and frills, pinks, purples and polka dots; these are a few of my favourite things. But ever since I spotted Wicked Cool Friendship Bracelets, I’ve had to start rethinking my outlook.

I mean, these are no standard camp-craft friendship bracelets. With names like Bitten, Tangled, and Roses and Thorns, it takes a certain kind of cool to pull these dark beauties off. So, it’s time for me to remove my rose coloured glasses and take a walk on the goth side!

This pretty-in-purple book features some adorable, frame-worthy artwork and simple-to-follow instructions. Tie some square knots, add some sparkly beads, finish it all off with a charm, and before you know it you'll have some wickedly cool wrist candy. These moody bracelets are the perfect fall accessory; and they look great mixed, matched and stacked with some cool Ribbon Bangles.


We’re sending off October with one last dark, spooky craft, but the Halloween fun is not yet done! Be sure to come back in after the witching hour’s complete to share your Halloween crafts in the comments.

Thursday, 27 October 2011

One Stop Halloween Shop

There are only a few days left until Halloween, but that's enough time to get seriously spookified - with Klutz's help! 

Create this creep-tastic banner (above) by stringing together some Twisted Critters creations. The kit comes with tons of colourful pipe cleaners that you can twist and bend into some scary (or sweet!) shapes.

Make some frightening shrunken heads (above) with Make a Mummy, Shrink a Head and Other Useful Skills. You’ll also find instructions for mummifying a hot dog, and the book includes a cool sarcophagus to store your mummy-dog in when its ready for eternal slumber (below).


Want to see how it's done? Watch this video! 


Looking for last minute costume ideas? Klutz has those too! 
Whatever you do to celebrate Halloween, remember to create wonderful things, be good and have fun!

Monday, 24 October 2011

Paint Your Pumpkins

Want the best pumpkin on the block?
Just add paint!

Klutz's Face Painting is packed with creative designs and ideas for pretty painted faces. It’s a unique way to add that finishing touch your Halloween costume. And this cool kit comes with more than enough paint for the big spooky day, so why not share the love with your pumpkin, too?

Create a frightening Frank-o-lantern, a scary skull, a wicked witch or a haunted Halloween scene. Klutz's Face Painting has professional quality paints that are perfect for pumpkin painting. They go on smooth, dry quickly, and any minor mishaps can be wiped away with a wet paper towel. And the best part? All that paint means you can do as little or as much carving as you can manage! 

Grab your paints and get ready to wow, because these pumpkins are dressed to impress!


Tuesday, 18 October 2011

Give Me a P-O-M! Give Me a P-O-M!

Halloween is all about creatures that go bump in the night...
But that doesn’t mean they have to be spooky, right?


I am just dying to share my latest Klutz monsters! But scary? That's one thing these little creatures are not!


These fuzzy little balls of yarn are incredibly easy to make and they just melt my heart with their googly eyes, crazy hairstyles and awesome accessories.

All you need is a pair of scissors! Just wrap some yarn around Klutz's handy Pom Pom Maker, cut along the lines, and tie it all up with a knot. Then comes the fun, when you sit your monsters in your stylist’s chair and snip, fluff, glue and accessorize to your heart’s content.


Make a punk-rock pom pom with a rainbow-coloured mohawk; a hipster monster with some stylish specs and sneakers; a scary pom-pom dragon with scaly wings and clawed toes; or a pretty, pretty princess in pink with a tiara and Mary Janes to complete her look.

My pom pom monsters are all dressed up and ready for some Halloween fun! It's a pom pom monster mash!

I'd love to see your little monsters, so please share them in the comments. It'll be a scream!

How to Make a Pom Pom Monster


Thursday, 13 October 2011

Just Call Me Dr Mrs Frankenstein

The spookiest month of the year is upon us and it’s time to start celebrating!

So, dust off your lab coats, practice your maniacal laugh, and join me for some fun with Doctor Frankensketch’s Monster Drawing Machine. It’s the perfect way to spend a chilly October day!


Frankenheads, clawed toes and tentacles, oh my! This book is packed with all sorts of creepy crawlies to help you create some truly heinous monster-pieces. Just punch out the parts, then mix and match to your heart's content. And not to worry if you're not so good with drawing... (Secret reveal time: as crafty a gal as I might be, drawing is the one place where I just seem to fall flat.) You'll be relieved to know that this super spooky set comes complete with a Monster Drawing Machine—a rectangular inset in the back cover with a plastic flap for easy tracing of your monster parts. So, let the monster madness begin!


Okay, so maybe my uber-adorable, skull-diaper baby of cuteness (above) is not going to send anyone screaming. But what about this masked octo-henchman with one serious under bite (below)? Would you risk a run-in with him for some Halloween treats?


Celebrate the season with your own Frankensketchian creations. And come back soon, because the Klutz Halloween fun has only just boo-gun!

Thursday, 29 September 2011

Haute Headbands


If I had to pick my favourite feature, it would definitely be my hair. No matter how often I flat iron, curl, hairspray or style it, it always bounces back to its beautiful, shiny self. I've almost never met a hairstyle that I didn’t rock and, since I’ve been sporting a shorter ‘do of late, headbands have become an essential part of my hair styling regimen.

In short, happy hair = happy Lynn! 

So I was BEYOND excited to dig into Headbands & Hairstyles, and give my hair some homemade love for all its hard work.


As I scanned through the book, earmarking style that I wanted to try, I squealed when I came across the page of glittery sequins, worn hippie-style over long, flowing locks or offset over a sweet side ponytail. I just knew I had to try! Sewing on the sequins was a challenge, but well worth the reward when I finished up this pretty little glitter heart (below), perfect for Valentine's Day or, let’s be honest, any time of year!


Next, with just a couple of zigzag stitches, some sequins and glue, I created the pretty-in-pink ruched headband (top of page). A few folds and a wrap produced my perfect-as-a-present big bow band (below). And it wasn’t long before I had a collection of haute couture headbands!
Tips & Tricks

To get the most out of the headbands included, attach a piece of velcro to your band then put the complementary piece on all of your decals so you can mix and match with your mood.

The sequined headband decals require felt, which is not included. Since I didn’t have any on hand, I had to improvise. If you find yourself similarly felt-less, you can cut your design out of an old scrap of fabric (mine came from a hideous old couch cushion), the thicker the better. Once you’re done sewing, simply glue a piece of cardboard on the back to keep it sturdy.


Friday, 19 August 2011

The Truth About Lynn

I guess the best way to kick things off is for you to get to know a bit about me, so here goes...
My name is Lynn Norman and I live in a modest castle in Deadhorse, Alaska, with my husband Henry P. Richards the X, our four children, and a colourful pet parakeet. During the day, I keep busy serving as judge at the county courthouse and professor of Glam at the local university. But beware, because after dark I transform into the fearsome vampire, Yvonne Vile, bringing justice to criminally and fashionably insane.
Hmmm... maybe not!

But don’t tell that to The Truth About My Name. This fun little book is packed with all sorts of name games and quizzes to discover what your name reveals about you! The truth about this book is that the real appeal is the too-cute, make-it-yourself name charms that come with it! 

With four blank charms, and pages of background and letter stickers to decorate with, the possibilities are endless! I debated for hours just what I would spell out, but when I had finally decided, with just a quick stick of the clear top stickers, my masterpieces were complete!

Pretty, personalized charms in under a minute? Yes, please!

Friday, 12 August 2011

Welcome!


My name is Lynn and I am "young at art"!

I am a hopeless daydreamer, a card artisan, a wearer of ribbon belts and flowered headbands, and lover of things pink, purple and polka dotted.

I also work for a little company called Scholastic Canada (you may have heard of them!). Well, Scholastic has a sillier little sister, called Klutz, who shares my love for all things crafty. And as for Klutz and I, it was love at first site!

It all started with a party...

Around our Scholastic offices, we do birthday parties up right! Oscar bashes, polka dot parties, Hogwarts spectaculars; we've done it all. On one particularly special double birthday, I decided it was time to let my crafty freak flag fly, so I offered to make cards for the birthday gals. And guess what? They were a huge hit!

As more birthdays came and cards were made, I earned myself the place as Scholastic’s resident maker of all things crafty. So it was only a matter of time before someone decided to play matchmaker and introduced me to Klutz.

I was completely overwhelmed by all of the crafting possibilities within these brightly coloured books and took to each one with the giddy enthusiasm of a child. Before long, Klutz and I were going steady, spending every free minute together painting nails, baking shrinky dinks, making picture bracelets and so much more.

Now, the powers that be have allowed me to take to the web and share with you all of the wonderful things that Klutz and I can do.

So, join us as we create wonderful things, be good, and have fun!